Tuesday, November 25

Despair on Ordroth

The heavy clanging continued, slow and methodical.  The deliberate sound of their approaching doom. 

Each of the handful of surviving guardsman had rallied around their Lieutenant, a junior officer who had managed to survive the initial assault, thereby assuming command of the entire substation they were charged with safekeeping.  They were huddled in the command bunker, surrounded by flickering consoles and failing communications equipment, safe behind a heavy blast door.  Hundreds of bodies of the Ordroth 144th Regiment of Foot lay strewn across the narrow corridors outside, piled on top of even more bodies - many of which were traitor guardsmen themselves, their own regimental markings long since removed.

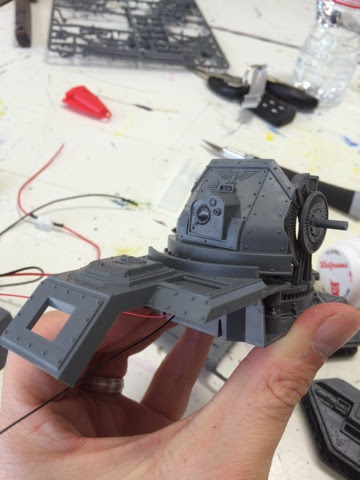
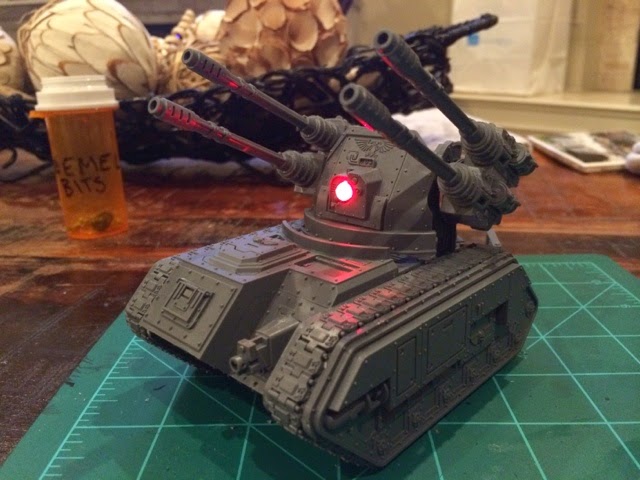
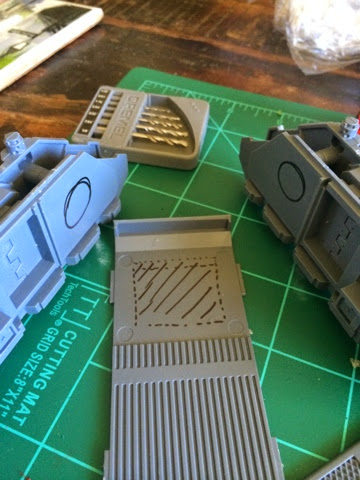
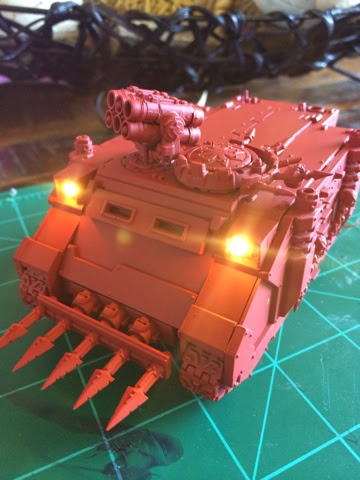
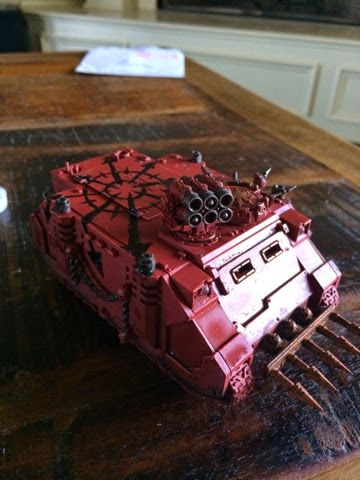
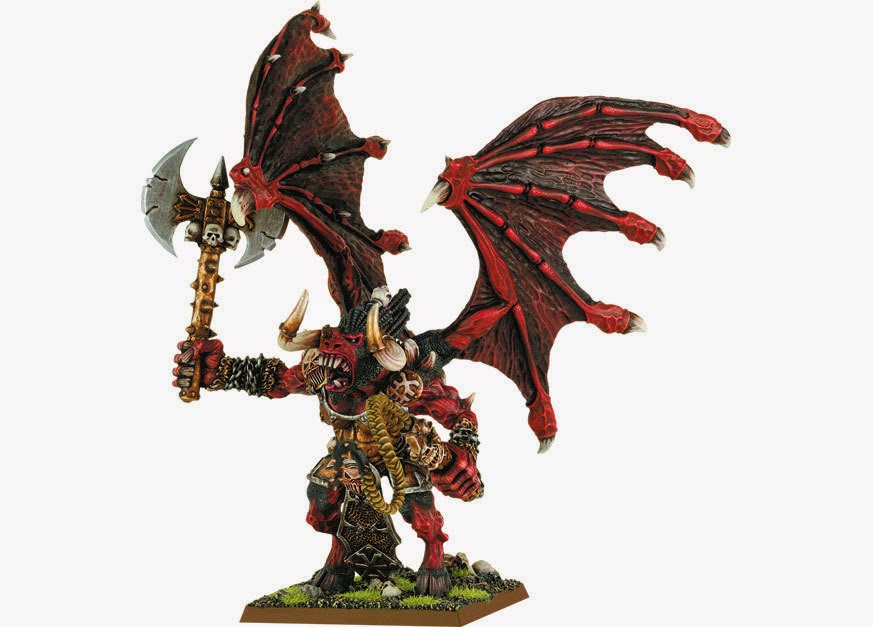
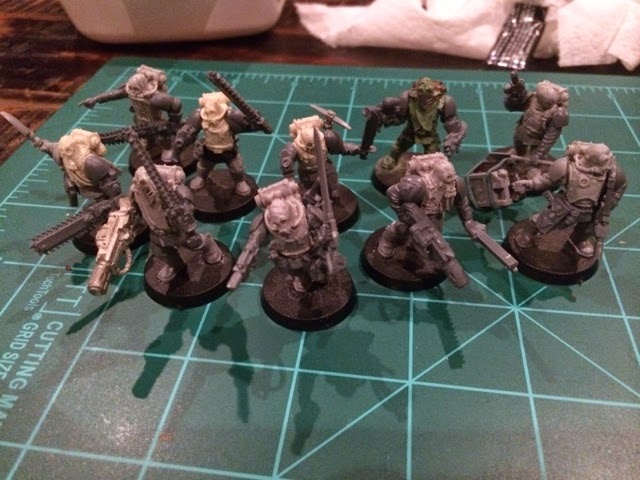
Renegade forces batter the staunch defenders with captured artillery.
 It was said that many regiments had joined the cause of the enemy, Urläg Blackfang, in the hopes of attaining a position of favor with their new overlords.  For days the shells of formerly loyal artillery batteries rained down upon the heavily fortified complex, crushing the resolve of the defenders within.  Suicide squads would charge into the claustrophobic and cramped passages of the bunker network, brandishing twisted metal blades and using depleted lasguns as crude clubs.  The wild look in their eyes could just as easily be that of blind devotion to their new gods, or a flicker of recognition of the monsters that they had become;  it mattered little to the loyal defenders who cut them down with disciplined fire. 

The metal-on-metal thudding was at its loudest now, heavy footfalls drawing nearer.  Terror permeated the command chamber, the nervous guardsmen looking up to their fledgling officer, who now appeared cool and collected.  There was no sign of emotion on his face - he had realized his dire situation, and was rising to the occasion.  This is truly a man they could die beside, they thought.  He was cleaning his ornamental bolt pistol, exchanging the magazine in a slow and purposeful manner.  A grim resolve swept over the handful of guardsmen, as they too rose, taking up a position in front of their officer.  If they would die, it would be on their feet! 

The regimental colors were unfurled, the line of soldiers were prepared behind crates of ammunition in a makeshift defensive wall.  The clanging stopped, the enemy was outside the blast door.

BLAM!

The Guardsmen looked behind their feeble line to see their headless officer slumped against a crate, the bolt pistol still smoking.  The regimental banner was splattered with gore as guardsmen snapped their attention back to the door as a terrible metal-on-metal tearing sound screamed through the room.  Sparks and smoke gave way to reveal a chainfist tearing its way through the bulkhead with remarkable ease, as powered fists tore back the shards of the once-mighty door.
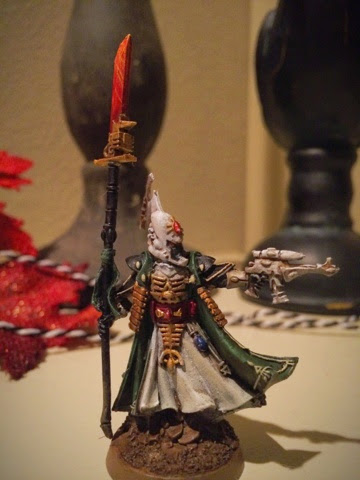
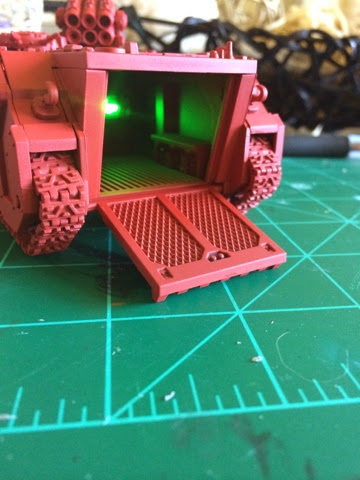
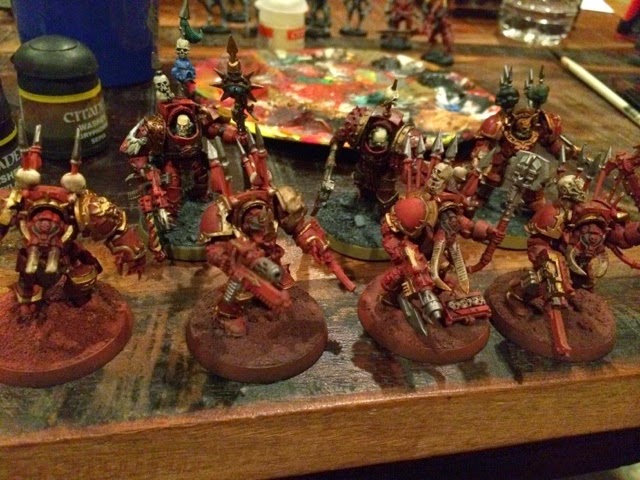
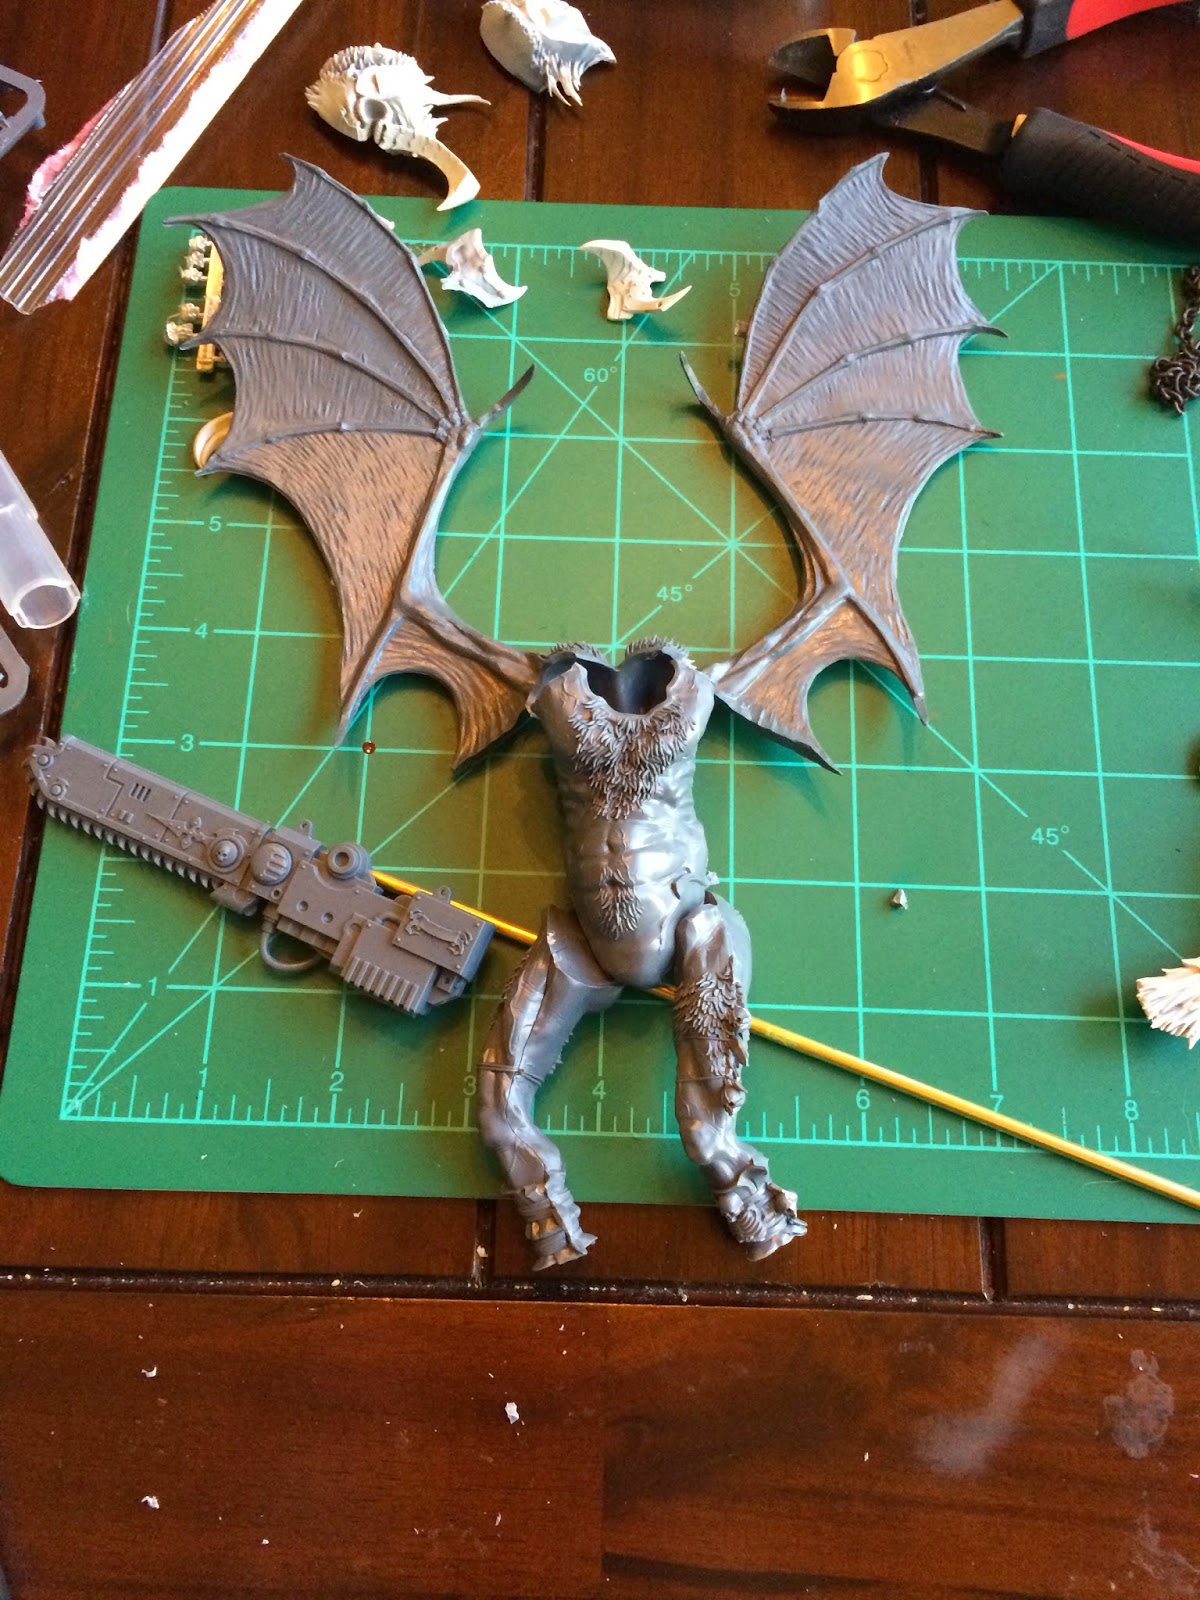
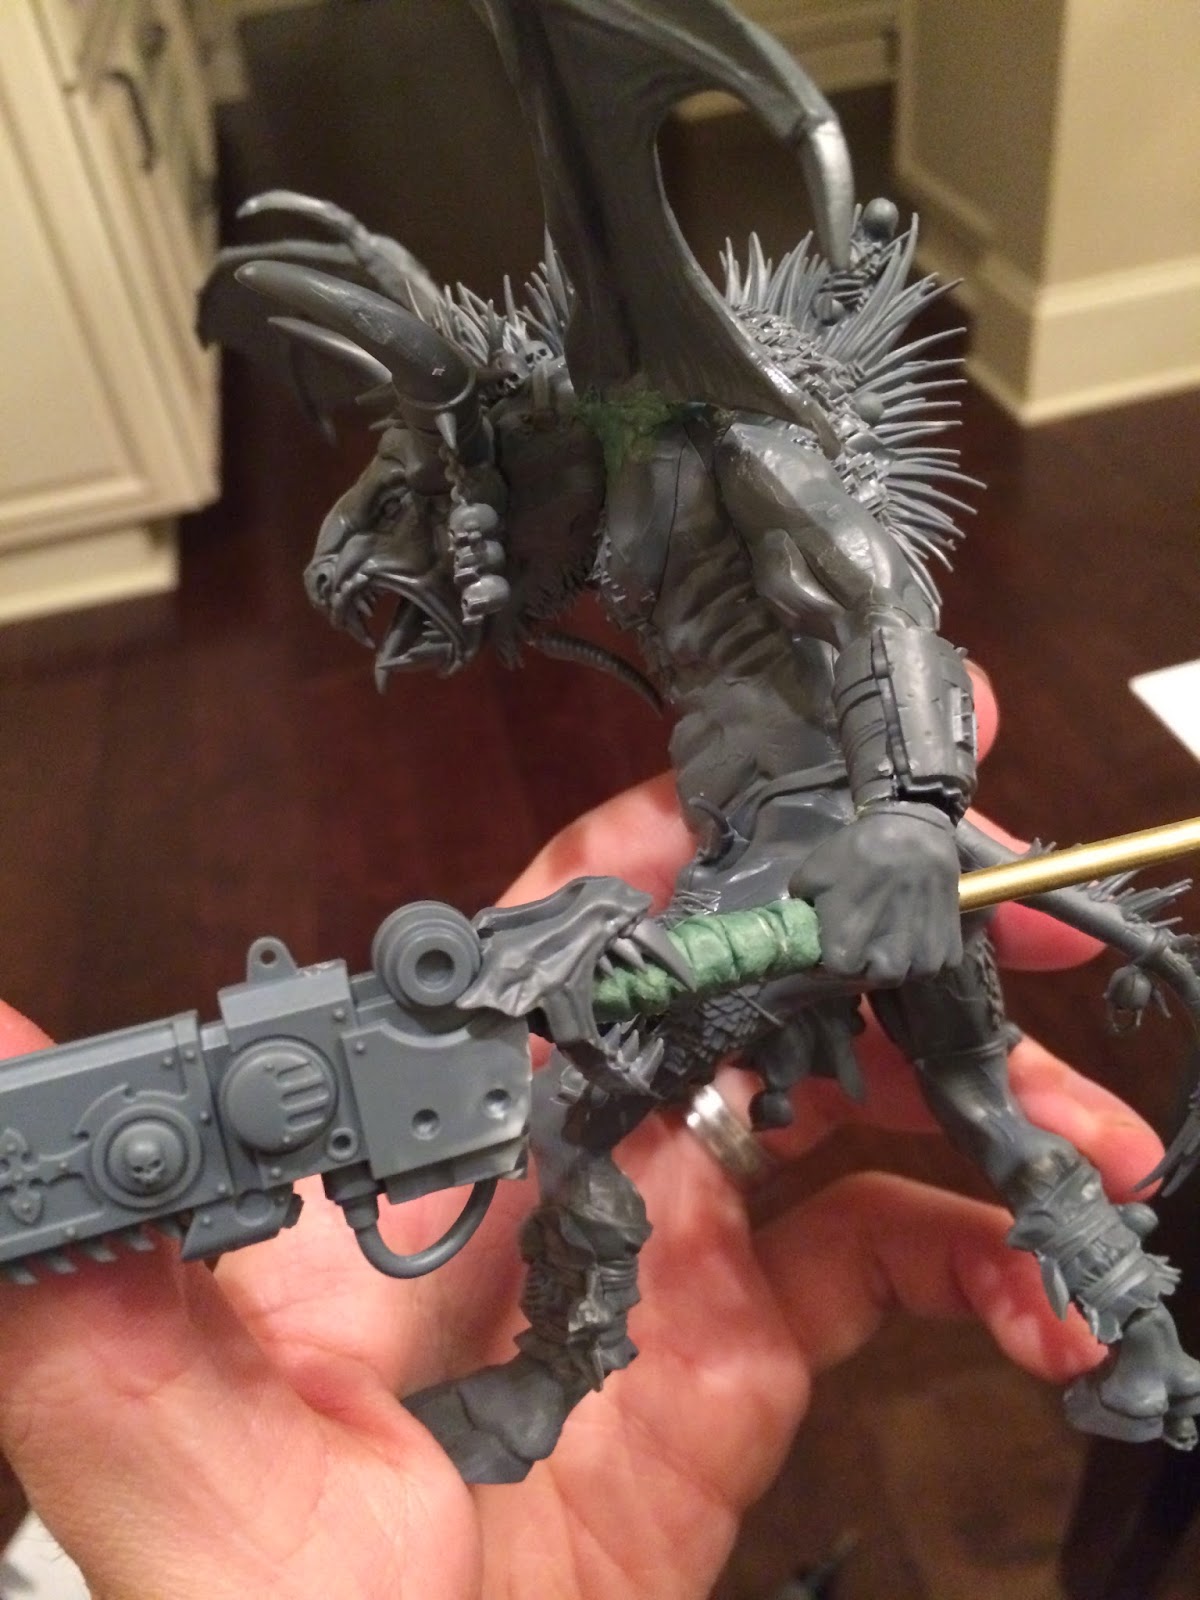
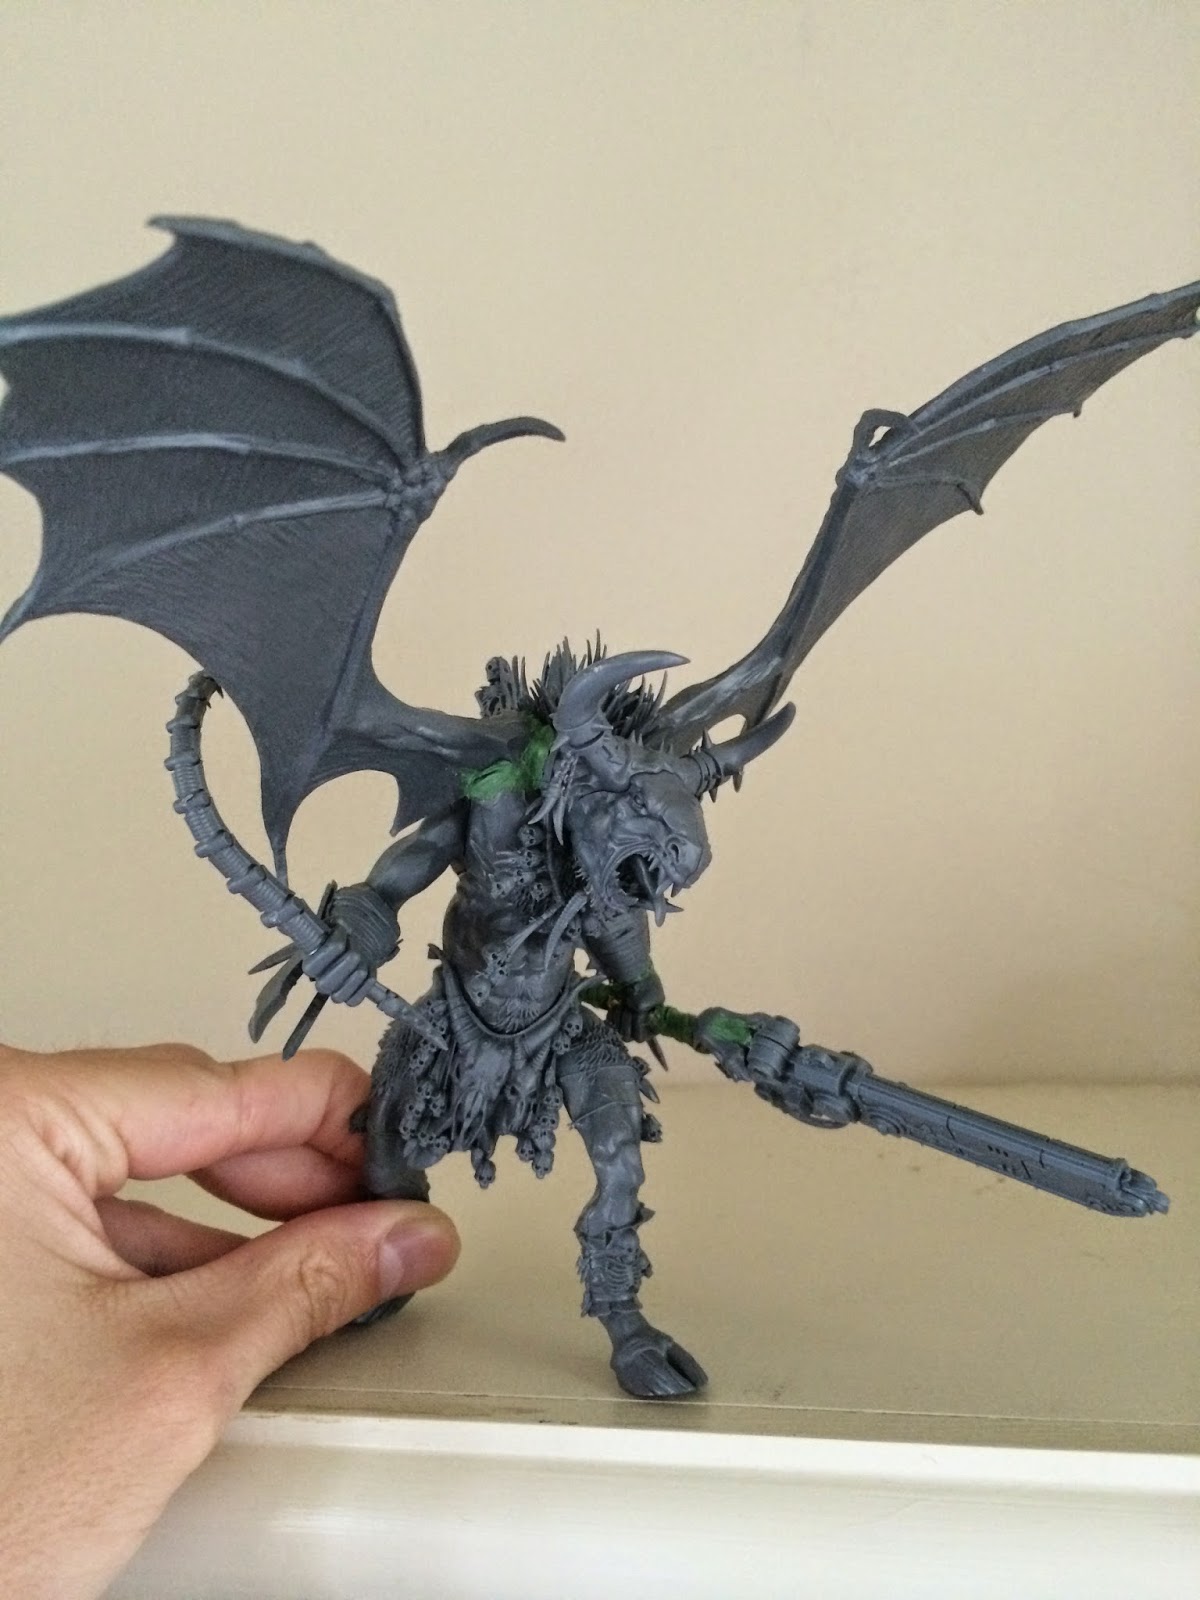
The enemy arrives.

Over eight feet tall, filling the entire passageway, stood a traitor marine armored in ancient terminator armor the color of blood.  The combination of awe and terror the remaining guardsmen felt was short-lived as it was replaced by the horrific sensation of burning as jets of highly volatile prometheum was ignited from the terminator's heavy flamer.  The screaming, flailing guardsmen quickly perished, as the handful of terminator-clad figures began their assault deeper inside the complex, the potentially heroic last stand of the Astra Militarum nothing more than a minor annoyance to these superhuman warriors.

A lone survivor huddled in the far corner of the command bunker was in tears, rocking back and forth.  The clanging footfalls grew more distant, until all that could be heard was the dull thud of overhead artillery falling on the fortifications.

Friday, November 21

Urläg Blackfang, Warlord of the Blackfang Warhost

I finally finished painting Urläg Blackfang, Chosen of Khorne, Herald of Terror, and commander of the Blackfang Warhost.  It took some time to settle on a model that was impressive enough to stand in for this hero I have dreamed up.  His vast army of followers comprises the traitor marines that followed him during the Heresy, as well as thousands of renegade guardsmen, who have been madly devoted to the promises of dark power.  Entire tank companies, whole infantry battalions, and enough warships to be considered a small navy have been drawn to the crusade from previously loyal Astra Militarum forces.  This renegade force is formidable enough, but with the added might of traitor Astartes, they are a grave threat to any who stand in their path.  Their Black Crusade is bent to the whims of the gods they serve, and will stop at nothing until complete glory is attained.  These are some bad dudes.

Urläg is a former Space Wolf Legion sergeant who succumbed to the hubris of his own superhuman quality. He, with his elite cadre of terminator-armor clad warriors, fully embraced the allure of Khorne's need for bloodshed.  After Prospero, Urläg's trusted ally, Hrodîr, a venerable Rune Priest who was himself was feeling the taint of chaos, had convinced Urläg to embrace his own destiny as something greater than what the pitiful Space Wolves had envisioned.

  
Some of the skulls and minor details have to be completed, but this is essentially done!
With the completion of this model, I have Urläg and his bodyguard of Huscarls finished, painted, and ready to carve their way into enemy defenses.  Next up, I'll need to paint another squad of marines (maybe my berserkers), which are far less entertaining than terminators. 

Thursday, November 20

Artillery Battery Reporting!

My chaos space marines are nearly all built, with their vehicles, daemons, and other goodies - this leaves me with a large bulk of modeling left to be done for my renegade guardsmen.

This far I've only built 35 infantry models (one full platoon of three squads with command section), three mortar teams, and two lascannon teams.  It's time to bring in the big guns!

A pair of Wyvern / Hydra self-propelled artillery will compliment my army's theme as city-fighting heavy combat engineers, employing their man-portable mortars as well as the impressive Wyverns to rain shells on entrenched enemies.

So looking at the kit, I was impressed.  The new kits that have been produced are top notch, in my opinion.  Great sprue layouts, intelligent mould lines (conveniently on hidden faces of components), and many movable parts!

Step 1 was to figure out if there was an opportunity for an LED - the only viable source on the model is the large spotlight on the front of the shield.  Instead of a headlight, I opted for a single red "targeting computer" which will tie the red color of my Marine army into these renegades (the renegade scheme will likely be a dusty brown), and add some nice atmospheric lighting during games.

The method for lighting a vehicle can be found in a recent blog post, the same principle applies here, though it was admittedly a little trickier having to route wires through the pivot point of the main weapon on this one. 

The OCD in me loves that lal my 5mm LEDs fit perfectly into most GW model kits.

Above, you can see the very slow-but-steady approach to lighting a model with LEDs.  Checking and re-checking to make sure everything jives is paramount, and as I was doing it on a lunch break with a handful of students watching (and asking questions!) it paid to go slowly.

It's aliiiiiiive!

Battery fits!  I ran out of coin batteries, so shoved a full 9v into the crew compartment.  A nearly perfect for, just opened a gap to give it some breathing room for easier access to replace a dead battery.

Computer tracking online!

All done!  Just needs a little bit of chaos love - some chains, carvings, skulls or spikes?  Then it's off to build the second one, then paint the beasts, finally resulting in anti-loyalist firepower for Kyle to deal with!

Now where did I out that can of brown spray paint..?

Tuesday, October 28

Eldar?

I think I mentioned (and if I didn't, here you go!) that we had a 1,500 point Eldar force donated to the Warhammer club I run at work.  My students are spearheading the painting of the units but wanted me to help out.  I decided to give the Farseer a once-over to get him presentable, so here he is!

Foul Xenos!

He'll soon be causing all kinds of mischief at our school games and potentially make some appearances in the campaign!

On a slightly related note, I began a Napoleonic French historical army for the Black Powder rule set, intending to use the ever-talented Perry Brothers minuatures (Games Workshop transplants).  We may have a non-warhammer feature page here, or I'll just include occasional snippets if not - but don't worry!  The Blackfang Warband is still growing in power... and I'm eager to get those Renegades painted!  I'll have a more comprehensive write-up soon!

Sunday, October 5

How-To: Lighting a Vehicle with LEDs

Everywhere I go with my army or terrain, people marvel at my headlights and interior illumination on my vehicles, or the red landing lights on my Skyshield Landing Pad.  I went to my local Games Workshop store this Saturday and everyone couldn't stop talking about how cool it was to have vehicles that lit up, and that they couldn't do that sort of stuff.  This got me thinking - those guys could easily do these sorts of things!

My land raider was the first time I've ever used LED wiring components in my entire life, and it was ridiculously easy.  Much easier than I anticipated.  I've recently acquired a Rhino transport for my Berserkers (or maybe Chosen, haven't decided yet), and figured I'd use this opportunity to do a step-by-step for anyone curious or scared at the idea of dealing with LEDs.

All materials for wiring and lighting came from Evans Design.  I find them to be the best quality, and alarmingly straightforward - they come pre-wired!  You simply match the voltage (there are only two options) with the associated LED you want, and connect the wires.  Twist black to black, and red to red and the connection is made, you're good to go! 

The hardest part is deciding what colors you want!  In my example below I used two 3mm "warm white" LEDs for the headlights and one 5mm Green for my interior lighting, all 3v.  I also used the coin battery with toggle switch.  My Land Raider used the 5mm LEDs for its headlamps, if that gives you any indication on scale.  You could make either work, honestly, so don't get too worried with matching the size exactly. 

Without further ado, here's my Rhino tutorial, but the project can be scaled up and made much more complex.  This is simply a basic framework from which you can experiment and learn new techniques!

Let's go!

1. Always dry-fit the pieces together (especially vehicles!) to make sure there are no problems in later steps.  This also gives you a broad view at where components will be placed, and allow moving parts to be accounted for.  In this example, I've decided to put the battery and switch in the driver compartment (smooth surface) and the wiring in the track guards.  The track guards on vehicles is usually the best place to route headlamp wires, as it's out of sight of interior space.  If you're one of the guys that glues the rear ramps shut, you have much more room to play with, and can even fit a 9v battery in there for some serious "Christmas Tree" scenarios.


2. Here I've taken the Rhino apart again, and marked out where I'll dremel out the gaps.  The square below the driver compartment will be cut away and allow access to replacement batteries and the toggle switch - remember to make it large enough for fingers to manipulate the switch or remove a battery!  The round holes is where the wiring will be fed to the headlamps.  Not pictured are the top plates of the track guards, Ive drilled out the space where the headlamps connect as well.  Be sure everything lines up and you have enough wire length to reach each of these places!


3. Starting to cut!  These don't need to be clean cuts, they'll all be hidden once I'm done.  The sonar panel section on the command console was conveniently the same size as the 5mm interior green light I want to use, so will work well at disguising the light when not in use.


4. Dry-fit again!  No glue should be used until you are 100% planned out on where things are going, and have double checked to be sure you know where wires are going.  If I were to have glued at this stage, I would need to thread the headlamps from inside the cockpit, and out the front holes, which would be damn near impossible.  Do this in separate stages while it's all unglued, then fit it together once the wiring and LEDs are installed.


5. Threaded and glued!  The careful observer will note that I made a big mistake here.  See how the wires come out the front plate section (where the windshield would go)?  That's intended.  However, I accidentally threaded two of the wires from below the cockpit (you can see it running under the vehicle) to the interior green light (where the mash of greenstuff is).  I have two sources of wire coming into the center, looped to a battery (out of frame), there is no way to get the entire assembly inside the vehicle!  This meant I had to re-wire the connections, a very tedious (but doable) step that could have been easily avoided had I checked myself.  Planning is everything!  Take these steps slow, and be methodical, you'll be happy in the end.


6.  Wiring corrected as per previous step, and testing for good connections.  No flickering, no dimming when the wires are jostled.  Always check to be sure the connections are solid before gluing everything in.  If a wire you twisted together comes loose after it's built and painted, you're probably not getting inside the track guards anytime soon.  I twist and bend my connections, but a better recommendation would be to use electrical tape to make sure its secure.  I try to be thorough, but I was too lazy to go buy tape for this demo.  I wouldn't recommend super glue or anything, as it will likely break the circuit connection.


7. Switch is glued into the bulkhead to give leverage when pressing it.  Which is something I neglected on my Land Raider.  On the Land Raider, having to pinch the unit by holding the back and pressing the toggle has taught me this lesson - hindsight is a powerful ally here, you'll certainly make mistakes, but learn from them!  Leave the battery free, however, as there's almost no way to get a disc battery out without gripping the top and bottom.  You'll want the wires a little loose to pull out of the opening as well, to really make it easy.


8. (Optional): Magnets on the bottom will be used to secure a plate to keep the free-floating battery unit from falling out.  It has enough friction and wires tangled up in there to not randomly fall out, but I wanted to be extra safe, as I did with the Land Raider.  I eventually used a spare armor plate that came with the Rhino (the one to make it a Predator turret instead of a top hatch).  This isn't as clean and well-hidden as the Land Raider (the rear power plant on the Land Raider is practically begging to be magnetized), but it serves the same purpose.


9.  The lighting is done at this point - now it's just painting!  Tape your lights with a small amount of painter's or masking tape.  I spray my vehicles red, and if you do all this work just to spray over it, you're not going to be happy.  Scraping paint off of tiny LED bulbs isn't fun - but it's possible, should you forget.  If you painted the interiors, be sure to tape closed the ramp so you don't get any spillover onto a potentially finished interior.


10. Rear shot of interior light, and functional ramp.  I strongly recommend painting interiors before assembling or lighting.  I did on my Land Raider and was very pleased.  The Land Raider has several functional doors and an elaborate interior, so that was a given to paint it carefully.  For this Rhino, I just gave it a quick once-over and was satisfied.  I'll do some detail work later if it strikes my fancy.  I've heard shaving down the rounded LED top to a flat surface diffuses the light more - I've done this for all my interiors, and it appears to work.  Failing to do this you get a circle of light projected straight out, something that isn't conducive to an interior light!


11.  Some freehand designs, a couple of washes, and some edge highlighting and I'm almost home free!  I stopped here after only working a couple of hours - and could honestly be done at this stage.  I'll pick it back up later and detail and weather the model when I have a little more free time.  The overall wash is drying in the image, so it looks a little wet.


There you have it!  A finished Rhino, totally illuminated with LEDs in under two hours.  With the pre-wired kits from this website, I cannot stress how simple and effective it is to add a little something extra to your kits.  The possibilities are endless!  They have LEDs the size of a pencil-point!  You could do Daemon's eyes, individual cockpit indicators in a Valkyrie, terrain illumination - anything!  The above method is simply a basic how-to, there can be a wide range of uses, so get to thinking!

Give it a try, and let me know what you think below!  If you have pictures of your own, please share them, or join the Google+ Warhammer 40k community and let everyone there know!

Blood for the Blood God!  LEDs for the LED throne!

Friday, October 3

Goal Met - Urläg's Huscarls

Urläg's most loyal followers, his chosen Huscarls, don the ancient Terminator Armor stolen from the armories of the Space Wolves when they turned to Chaos.  Over the many hundreds of years, these once magnificent suits have been warped and bent to the will of Chaos - daubed red from their thousands of victims during intense boarding actions and vanguard assaults.

I decided last night I'd complete a unit, hell-bent on accomplishing the daunting task of painting (to completion) a full unit.  I chose six terminators, and got to work!

Choosing to assembly-line them was a great decision.  I was able to paint them consistently and make them appear to be a cohesive unit, while cutting down on time spent on each model.  Being able to focus on one task, say, the brass shoulder trim on each model, really allowed me to speed the process up.


As usual, the can of red citadel spray paint is a miracle worker for my army.  It takes out the most tedious step in painting figures, the initial base coat!  All I had to do afterward was wash it in a deep red, trim the brass, add metal for gun barrels, various trim colors, eyes, etc, and that's it!  A quick once over for the bases and I had an above-average painted unit in a couple of hours.  They won't win any contests, but they are certainly to a standard I am very happy with.


The toughest decision was picking a color for my power weapons.  Green was my first choice when I painted my first Chaos model, but I've decided I need it to pop more.  A bright blue fits the bill, and has the bonus of being an "icy" weapon, fitting of the Space Wolf theme. 


Overall I'm pleased with the result, and can't wait to knock out my regular marines next (I painted all the fun stuff first, shame on me).  My army is slowly losing it's Hatred: Unpainted curse, and will once more be the scourge of the Van Hassan system!

This also counts as a complete unit for my To-Do list!  Hooray, Khorne!


Friday, September 26

Search for the Ark of Scorn, Part 1 Preview


Blood in the Snow
Good day all! 

Today +Andrew Dart is taking his Khornate warband into the snows of a ruined world in order to recover archaeotech that will lead to the long-lost Space Hulk, Ark of Scorn. Unfortunately for the budding warlord Urlag Blackfang, his plans are being impeded by a group of orks in search of the same ship! With the astrogation device's components spread over a large stretch of the icy world's surface, the two warbands will have to face both one another and the elements in order to recover a clear picture of the Space Hulk's whereabouts.

We've been promised a battle report in the next few days covering the ingame action that will unfold. In the meantime I offer you a short snippet detailing one of Urlag's followers before the battle, alongside a rough of the scenario I created for this game. Further shorts such as 'The Huntmaster' will be coming soon as we progress further into the Hollosun Campaign!


Thursday, September 25

More Renegades, More Blood!


Over the past two weeks I've been piecing together various units for my Renegade Guard allies list.  I hear rumors of an updated Imperial Armor book with a brand new Renegades army list is on the horizon, so I'm eager to get these guys built up and painted.

I'm keeping loadouts fairly generic to accommodate any changes in the rules, but I think these are pretty standard Astra Militarum fits.


Wednesday, September 24

Ultramarines Update : Landspeeder Storm and Close Support Squads

Reconnaissance Force Itheric
Work in Progress Update
____________________________________

Landspeeder Storm and Close Support Squads


Seeing the wanton progress my colleague +Andrew Dart has managed with his blood-hungry hounds, I stepped up my game and got most of the Recce force assembled since my last post. This included properly basing my mobile command Landspeeder Storm (finally) and adding an unexpected group of five more scouts. Somewhere along the way I had miscounted the pile of parts I'd scraped together, apparently, so five more scouts have been assigned to Reconnaissance Force Itheric!

Up until now I've not published any official list representing the troops assigned to Telion's mission, a matter I intend to rectify in this post. I'll freely admit that this is not at all a competitive force but has, within its given theme, been selected with an eye towards efficiency. My goal was to make the most use out of the pile of scout bits I had collected over the years with very few purchases - to which I then will add some punch, as you'll see!


Saturday, September 13

Sabol Transport Cases

After a tidy eBay sale, I was sitting on a little but of extra hobby funds. I've needed an army case ever since I sold the old plastic Games Workshop one I had for my Orks over 10 years ago, so opted to look into the higher end versions by various vendors outside of GW. 

I placed an order for a Sabol Armytransport MkIII and the associated foam inserts.  The nice thing that surprised me was the options of foam you can select while purchasing.  My particular case is 14" tall, with the other usual width and length dimension, so I could choose any number of foam inserts that equal 14" in height.  


I was sure to get the largest 4" thick foam for my land raider and maulerfiend, which would be difficult to transport, and still have enough room to carve out a slot for my terminator warlord (which has an impressive trophy pole, warranting the tall foam).


The second foam sheet (which I forgot the exact thickness, 3" I believe) is large enough to fit standard vehicles (not Land Raiders), and I'll probably stand my terminators up in this particular section.

The next four sheets are 1.5" sheets that I'll use for all my infantry.  Marines, daemons, renegade guard.

The foam is perforated in a grid, and easy to "pick-and-pluck" the sections out that need to be removed.  And at a fairly low cost, you can buy plenty of replacement sheets, enabling plenty of loadouts in a single bag.


My only issue now stands as having to find a way to transport the Heldrake, Knight-Titan, and Bloodthirster.  Does anyone have any experience with the "motor pool" Sabol army case?  Would love input!

Overall I'd highly recommend the case. It's sturdy, well made, customizable, and can be worn as a backpack or carried with the sling.  It also has pockets for game accessories, a codex, etc.  It sure beats my old tackle box when I was 13!

Wednesday, September 10

Goal Met - Summoning An'ggrath the Unbound, Chosen of Khorne

 Update (October 31, 2014): After receiving my Imperial Armor: Vol. 13 book a week ago, I realized this conversion will represent (quite appropriately!) the special Bloodthirster in the appendix of the book, An'ggrath the Unbound.  I am very pleased to have built this guy for just such a book to be published shortly after!

Another big milestone achieved.  At this rate I may have to add a few more items to the list so I can keep up with stuff year round!  Regardless, this was one of the major items on the To-Do list challenge I began last month at the behest of +Dave Weston!


After building a bunch of marines, traitor guard, and bloodletters, I soon began to thirst for something.. bigger.  To fill this role, I looked to my sorcerer, Hrodir.  He is, of course, Urlag's trusted and loyal ally, employing magics and sorcery to help their nefarious cause.  Powers augmented by the chaos artefacts found on Prospero, in addition to his inherent talents at rune-casting and foresight, make him a powerful ally indeed.

My recent purchases of Bloodletters were acquired solely for the summoning spell from Hrodir (with a small possibility of an allied contingent as time goes on).  But why not summon the big dogs, a Bloodthirster?

So my mind was made up, I need a bloodthirster.

And preferably not one circa 1996.

The task, then, was to scour for bits that I'd want to use.  And it soon dawned on me that the Warhammer Fantasy line of Beastmen had the ideal basis, the Ghorgon.  Next up, some wings.  After a small search, it was discovered that the largest and most impressive wings could be found here, from the LotR range.  What's more is that they're plastic - no fiddling around with those huge metal clunkers on the classic Bloodthirster!  The rest was easy - I had leftover Lasher Tendrils (Maulerfiend) to make a whip, and a Knight Titan chainsword to convert into an immense chain-halberd.  Thinks were shaping up!


Getting a feel for the size of this bad boy.  The Chainsword looks a little big.
Lasher tendrils to be re-purposed as whips.

Starting to get some glue!

Green-stuffing the gaps with some fur (in-progress).

The chainsword is entirely too big.  I'll need to trim down the engine housing.

Knocked off the rear power plant, added some gnarly teeth and starting the banding.

Hrodir and his new friend.  Terminators come up to its knee!

The finished build.  Lacking armor plates, but I think I may like it better like this.

So there it is!  An impressive build, bigger than I anticipated, it doesn't even fit on the 60mm round base I wanted to use!  Had to order a single Maulerfiend base to mount him on.  What're y'alls thoughts? Should I change anything? Add more?  I have a bunch of scale chain links to wrap and add if that will make it more menacing.  Let me know what you think!

I'll throw some paint on it this week.  But for now, let me check this bad boy off my list!

Melochor the Dread, Lord of the Bone Sacrament, Defiler of the Thirteen Sanctuaries of the Eternal Spire, Blood-Chosen of Khorne's Court of Skulls. Behold!

Dart, out.

Saturday, September 6

Ultramarines Update from Outpost Houston


Reconnaissance Force Itheric
Work in Progress Update
____________________________________

I'm not dead! I don't want t'go on th'cart!

I am, however, reporting in from Houston with some progress updates on my Ultramarines scout force. My writing sojourn here ended up with a bit of difficulty working on models, as the apartment took some settling in and I don't have my usual work space. After some time though I managed to put effort into this project, including sprucing up some old metal melee scouts!

That little job reminded me how much I'm grateful for resin, even with the problems Finecast has had.

Pinning my scout helmets into place and doing a few other modifications really helped bring the old models (stamped 1997!) back to life. Almost enough to make cutting, sanding, and otherwise mauling the heads off them worthwhile. One is left as I didn't bring enough helmets for the metal nuisances.


A few more plastic scouts came off the proverbial assembly line too, which includes finishing up Sergeant Vanus that leads the close support team these metal gents belong to. His running pose and bionic arm, not to mention a combi-flamer from the Sternguard kit, really help set him apart in my book. The other two scouts represent a member of Telion's strike squad, complete with camo cloak and bolter, and a fire support member from one of the sniper teams.

The cloak was created by a mix of milliput standard and green stuff, 50/50 mix, and after smoothing allowed to cure a bit before gently layering in place. Vaseline and clayshapers helped fold it over on itself without sticking. Quite pleased with how that came out - only four more to go!


A small update all around but hopefully gives everyone a little insight into where things are going with this force. I've got some fluff additions to make as well, of course, continuing the Hollosun Incident stories leading up to getting my campaign with +Andrew Dart going. 

With things more settled here I'll certainly be more active. 

Happy gaming!

Tuesday, September 2

Dark Beginnings - Prospero

A brilliant blue flash engulfed the horizon, blinding all combatants, dazing even the mightiest of Astartes who were fighting on Prospero's surface.  When Urläg squinted up, his opponents were gone, the Thousand Sons had simply vanished.  He spat, clearing his mouth of the blood that had accumulated there.  The ornate grey terminator armor had been covered in the blood of his adversaries, his chainaxe slick with gore.  His desire for bloodshed had grown to exceed those of his typically savage Space Wolf brothers.  Urläg roared in anger, furious that this great contest of strength had abruptly come to an end with the cowardly use of sorcery by the traitor legion. 

The massive spires were ablaze, gleaming white structures that housed relics and tomes of untold power - all put to the torch.  Urläg could not begin to comprehend what had just happened, or what damages had been caused that could never be undone.  It was none of his concern.  He had been tasked, as had the rest of the legion, to exact a decisive blow to the Thousand Sons on Prospero.  Leman Russ himself led the attack.  Urläg Blackfang and his elite cadre had witnessed their Primarch battling the traitor Magnus the Red, a struggle of titans, a worthy battle.  Magnus, too, had mysteriously vanished in the blast. There was a moment of silence and confusion that lingered, some foul sorcery had been used against them and honorable combat could not be joined.

The Space Wolf Legion assaults Prospero

"Regroup on me." came the calm-yet-fierce command from the bloodied Wolf Guard leader.  Urläg needed to prepare his squads for departure, their task had been completed, albeit to a standard he did not enjoy.  He didn't waste a moment surveying the field.  "Hrodir, make best speed to our position, you've been inside far too long."

"I'm already on the way, but there is so much to be learned if we stay.  Surely the knowledge of our enemy can--" the Rune Priest was suddenly cut off by Urläg's sharp response, "No, and hurry, the entire complex is about to collapse.  You may return with the survey crews if the Primarch wishes it, but I don't think your runes could predict even that decision."

Hrodir, alone, nodded in silent agreement to Urläg's command, deep in the darkened vaults of one of the many libraries on Prospero's surface.  The sole defender of these artifacts had vanished only moments before, a crimson-clad space marine, his weapons clattering to the floor as his body was ripped through the Immaterium.  Hrodir gathered up the few scrolls he had managed to reclaim, and turned to exit the great chamber, finally noticing the wicked staff laying between himself and the vault's portal.  His mind raced, thinking of the previous day, to him casting his runes for a portent or omen of good fortune, of the uncertain future.  The stones had fallen in such a way to suggest great upheaval of power, of great battles, deception, and change.  Change.

Whispers. Hundreds of languages, voices of all vocal ranges quietly murmuring at a frantic pace.  They came to an abrupt stop as soon as his fingers touched it.  Hrodir's grasp on the haft tightened, lifting the staff.  The silence was deafening, he understood now.

+++++

[More to come]

Saturday, August 30

Goal Met - Renegade Progress


Hot on the heels of my last post about achievement milestones in this build, I decided to work towards my first minor goal: the completion of my renegade Engineer squad!  And complete it I did!

Equipped with two melta guns, a demo charge, and an enforcer with a power sword, these will be my armor hunters and general badasses.  


The renegades that I chose to model for Urläg's warband are part of Van Hassan's home guard forces.  Particularly I'm representing an artillery company which includes heavy combat engineers (lots of shovels, pickaxes, stowage, tools). The demolition charge seen in the above picture is a fitting addition to this theme, as it's a pair of fuel canisters wired with explosives.

The renegade list (which is a free PDF from Forge World!) lists this particular unit as Disciples of Xaphan (or something similar), an Elite choice.  They'll serve the role as engineers both in the way I've modeled them, their wargear options, but additionally with the Infiltrators special rule that comes with this troop selection. I can imagine these grizzled bastards picking through the rubble of a war zone to lay in ambush for the foolish Ultramarines.  

I'll definitely try to make Kyle's scouts worry about finding these guys a priority!

Blood for the Blood God!